
What You Need to Know About Securing Exchange Online: PowerShell Basics

| TL;DR: | Microsoft recently released the GA version of their Exchange Online V2 module for PowerShell. In order to configure some of the more advanced settings for Exchange Online, familiarity with PowerShell is going to be required. Knowing how to store variables, run commands, and connect to Exchange Online will be the bare minimum to get started. |
Exchange Online Security
Exchange online security is another one of those huge areas that can be difficult to cover in just one sitting. Topics here can range from making sure offboarded employees cannot sign in, to disabling protocols per user, or preventing client access for the entire organization based on protocol, user, or public IP, and that is just the start of it. Our future posts will go into some of the more intricate details of securing Exchange Online but before we can do that, we need to make sure everyone is familiar with PowerShell (PS) at a base level.
The reason for this is three-fold. First, some information can only be gathered via PS. Second, some settings can only be configured via PS. Third, when you need to affect users at a large scale, you will need PS for some settings (unless you like clicking through the Exchange Admin Center a million times).
Practical PowerShell Basics
Disclaimer: We aren’t going to go over the finer details of the “internal machinations” of PS. Our goal here is practical use of PS for administration of Exchange Online. The terminology, definitions, and examples are all geared toward this purpose with an intended audience being those beginning to use PS.
Let’s go ahead and set the stage by opening PS and checking to see what our version is. You can do this by running the following command:
$PSVersionTable
When you run the command, you will see your PS version information displayed on the screen:
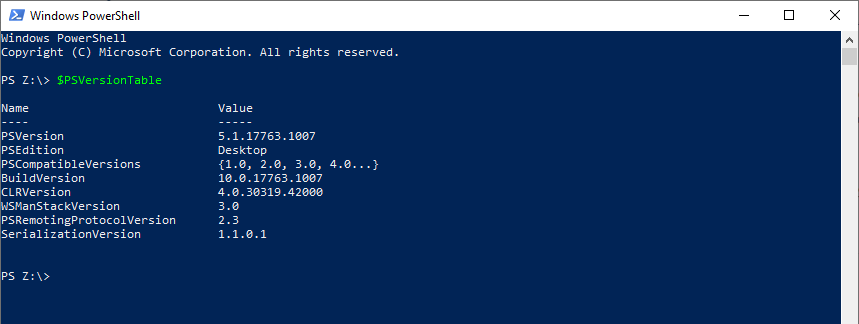
These results introduce us to a couple of core concepts: variables, shortcuts (aka Aliases), and command logic.
Variables
Variables are just another name for a container in PS. Think of a basket. You can place any number of objects, like say bread, cheese, and wine, into a basket and go have a picnic. You won’t have a picnic if you are working in PS but it can be just as fun!
With the example above, $PSVersionTable is our basket and it holds one object, a Hashtable. That Hashtable has Key/Value pairs that equate to what was displayed on screen. Just like a basket can hold multiple items, so too can a variable hold multiple objects. Let’s go ahead and try it out.
Run the following command:
$Basket = “Bread”, ”Cheese”, ”Wine”
$Basket
Your results should look like this:

What we have done here is create a variable named Basket and assigned it a set of string objects where a string is a set of characters. In other words, we stored those objects in the Basket container. The next command should look familiar. By typing the variable name with a $ in front of it, we tell PS to show us what the contents of the container are.
With both commands completed, we are ready to venture into some of the shortcuts available within PS and wouldn’t you know it, there is already some mastery of this topic, so congratulations!
Shortcuts (Aliases)
To introduce shortcuts properly, realize that all the commands we have run so far have been cut short from their original iterations. For example, if we wanted to do the same exact variable assignment for a variable named Basket2 and then show what the values of that variable are, this is what the long-form approach would look like:
New-Variable -Name "Basket2" -Value "Bread", "Cheese", "Wine"
Get-Variable -Name “Basket2”
Your results will look like this:
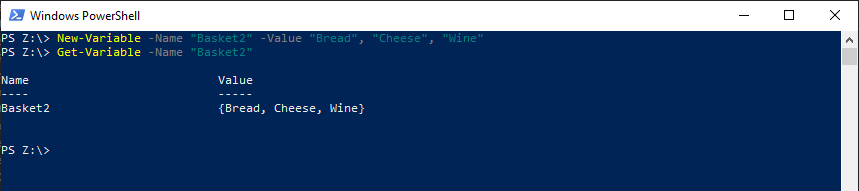
Notice that the results from the Get-Variable command do not match what we get if we were just to show the variable by running $Basket2. This is because what is returned by the Get-Variable command is the variable, not the contents of that container. In other words, it is like picking up the entire basket, filled with items. While you can “see” inside the basket (the value column pictured above), to actually access the items inside you need to “open” the basket.
We will open the basket with the use of another core shortcut concept called piping. When we pipe in PS, we take all the results of a command and feed them into another command. For example, let’s run the following code to get the values of the Basket2 variable from the Get-Variable command:
Get-Variable -Name “Basket2” | Select-Object -ExpandProperty Value
The results of the command will now show the contents of Basket2:

This brings us to the last topic for this post, command logic.
Command Logic
Command or script logic is the flow of the PS commands throughout a PS session. At a high level, command logic is read from top to bottom and left to right. More intricate scripts can get more ambiguous as preset groupings of commands, called functions, allow script logic to be reused throughout a script. For now, we can focus on how command logic can be used to pair multiple commands together to achieve desired results.
We mentioned earlier that the pipe command is a shortcut. So how else can we show the results of our Get-Variable command (“open” the basket) without the pipe? We could run the following commands:
foreach($picnicItem in $(Get-Variable -Name "Basket2").Value) { Write-Host $picnicItem}
The results of the command will show that the output now matches what was previously generated from our other commands:

From left to right, there are a couple of new concepts that need to be explained. First, is the concept of a foreach statement. The foreach statement is a templated function in PS that allows the iteration of the objects in a container, one at a time. The basic structure is as follows:
Foreach("New Variable" in "Existing Variable"){ "Command logic to run" }
Get-
Like all variable assignments, the names of new variables are entirely up to the creator.
For the script above, if we translate the code to layman’s terms, what we are saying is as follows: For each picnic item in the basket, tell me what that item is.
When PS is handling the command logic, it follows those orders exactly. First it considers the foreach() parameters and grabs the first item in the basket and stores that item in the picnicItem variable. In this case it is “Bread”. Then PS looks at the command logic and sees the request to write the value of the variable onto the console, so it displays Bread on the console.
After the command logic is completely evaluated, PS will then take it from the top again, but this time will grab the next item from the basket, in this case “Cheese” and store it in picnicItem. Then PS will evaluate the command logic, which states to write the value of the object onto the console, so it displays Cheese on the console.
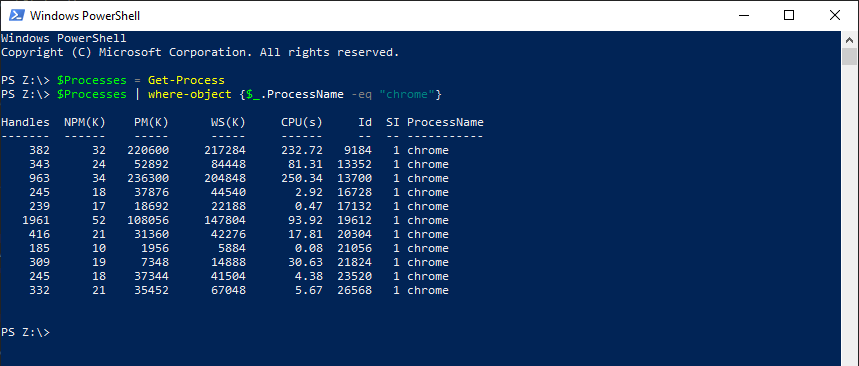
PS will continue to iterate through all the items in the basket until no more items are left and then the command’s run has ended. To start winding down, we are going to go over a little bit of a more complex assignment scenario. So far, we have kept things simple and manually assigned some strings to a variable but as we progress, the assignments are usually dynamically populated from the results of commands, so we need to get used to doing that. For example, if we wanted to store the objects representing all the running processes on our current machine, we could do an assignment variable like this:
$Processes = Get-Process
We could then manipulate the objects in that variable any way we see fit. For example, to show only the processes named chrome, we can pipe the results of the object to a Where-Object command that we can use for filtering:
$Processes | where-object {$_.ProcessName -eq “chrome”}
Remember that when piping, the functional equivalent is a foreach statement. In this case, $_ is akin to the
Conclusion
We can only have so much fun in a day with PS before we start to lose focus, so this is a good stopping point. We went over variables, how to assign values to them, how to use shortcuts to cut down on our work, and how command logic is structured. Stay tuned for more PowerShell Basics as we dive into connecting to Exchange Online and using what we have learned to administer users and settings.
Microsoft Source: https://docs.microsoft.com/en-us/powershell/
Exchange Online V2 Module: https://docs.microsoft.com/en-us/powershell/exchange/exchange-online-powershell-v2?view=exchange-ps